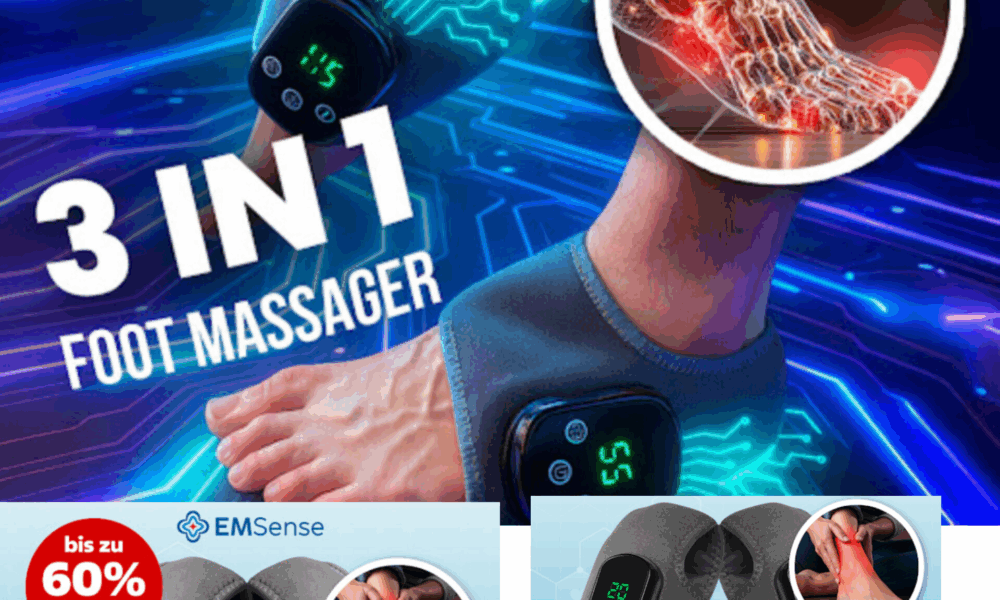
The EMSense EMS Massager is designed for people who want targeted muscle relief without leaving home. It uses electrical muscle stimulation to prompt gentle contractions in tired or tense areas, helping the body relax while supporting circulation and recovery. Instead of relying solely on hands or foam rollers, the EMSense EMS Massager delivers consistent pulses that you can fine tune to your comfort level, so each session feels controlled and purposeful.
Modern routines are demanding. Long commutes, desk work, high intensity training, and even weekend chores can leave muscles stiff and sore. The appeal of the EMSense EMS Massager is that it meets you where you are. You can use it while you read, watch a show, or unwind before bed. It aims to make consistent muscle care practical, not a once in a while luxury. By pairing compact hardware with adjustable intensity, it gives you a way to address the spot that aches right now rather than scheduling relief for later.
Electrical muscle stimulation has been part of athletic recovery and physical therapy for years. The benefit for everyday users is control and repeatability. With the EMSense EMS Massager, you select a program that suits your need at the moment. A calm pulsing rhythm helps soften tight shoulders after hours at a laptop. A more assertive pattern supports recovery in the thighs or calves after running or football training. Because the stimulation is applied through pads at the surface of the skin, you can place it near the muscle group that needs attention and let the session run its course without constant adjustments.
Comfort is central to whether a tool like this will be used often. The EMSense EMS Massager emphasizes smooth sensations rather than sharp tingling. Good design here means a waveform that ramps up evenly, so you feel the muscle engage without sudden spikes. It also means a range of levels wide enough that a beginner can start gently and a seasoned gym goer can step up when needed. That balance helps you stick with a routine, which is the foundation of results for relaxation and recovery.
GET 60% OFF EmSense Massager Now!
Portability matters as well. A device that fits in a small bag or drawer is far more likely to be used every day. The EMSense EMS Massager is built with that in mind. You can set it up in minutes and put it away just as quickly. A rechargeable battery supports regular sessions during the week, and a clear display or indicator takes the guesswork out of how much time is left. This makes it practical for home, office, or travel, so your recovery habits do not fall apart when your schedule shifts.
The EMSense EMS Massager also acknowledges that different muscles respond differently. Calves may prefer a shorter pulse with a brief pause, while the lower back or traps may feel better with a slower rhythm that allows the muscle to relax fully between contractions. Having multiple programs is not about novelty. It is about matching the stimulation pattern to the tissue and the goal, whether that is easing stiffness, reducing the feeling of heaviness after a long day on your feet, or preparing muscles for gentle stretching.
Ease of setup supports safe and consistent use. Skin friendly pads help conduct the signal and keep contact comfortable. Clear placement guides reduce trial and error so you are not guessing where to put the pads on your quads or shoulders. A session timer ensures you do not overdo it, and a simple lock function prevents accidental changes while you move or adjust your posture. These small details remove friction and make regular care feel natural.
For people who exercise, the EMSense EMS Massager fits neatly into warmups and cooldowns. Before activity, a brief low level session can help wake up a muscle group so movement feels more coordinated. After activity, a slightly longer session can encourage relaxation and help the body settle. For non athletes, it can be a quiet way to end a workday, releasing neck and shoulder tension before it turns into a headache or restless sleep. The key is consistency, and the device is built to make short, frequent sessions simple to carry out.
It is also important to set expectations that are realistic. The EMSense EMS Massager is not a medical cure, and it does not replace professional care when you need it. It is a practical tool that can support your routine by promoting comfort and helping you feel ready for whatever comes next. People who combine it with hydration, light mobility work, and sensible training or work habits tend to get the most from it. Think of it as part of a small daily ritual that keeps your body feeling balanced.
If you have sensitive skin, a pre existing condition, or you use implanted medical devices, you should consult a clinician before starting electrical muscle stimulation. When used appropriately, the sensations should feel firm yet comfortable, and you should always begin at a low level. The EMSense EMS Massager gives you that control. You can pause, adjust, and resume without hassle, which helps you listen to your body and progress at your own pace.
In short, the EMSense EMS Massager brings structured muscle care into everyday life. It blends proven stimulation methods with practical design so you can attend to tight calves, a sore lower back, or weary shoulders without leaving your space. The introduction ends here, and the next section will explore what the product is in clear terms, followed by how it works, who benefits most, and how to integrate it into a weekly routine for consistent relief and recovery.
The EMSense EMS Massager is a compact device that relies on electrical muscle stimulation technology to help ease tension, improve circulation, and encourage faster recovery from daily strain or physical exercise. Unlike handheld rollers or vibration tools, it works by delivering controlled electrical pulses through skin-friendly pads that are placed directly on the muscle group needing relief. These signals trigger small contractions, imitating the way the body naturally activates muscles, which in turn can reduce stiffness and encourage relaxation.
At its core, the EMSense EMS Massager is designed for people looking for a straightforward, non-invasive way to maintain regular muscle care. It is not limited to athletes or fitness enthusiasts. Office workers, drivers, or anyone who experiences tight shoulders, lower back fatigue, or heavy legs after long hours of standing can use it as part of their daily routine. The idea is to make structured recovery accessible without the need for specialized appointments or bulky equipment.
The device is built with simplicity in mind. It usually comes with reusable electrode pads, a small controller unit, and a rechargeable power source. Users can select from multiple modes that vary in rhythm, intensity, and frequency, ensuring that each session is tailored to the type of discomfort or the goal at hand. Short, gentle pulses may be chosen for light relaxation, while stronger, deeper patterns may be used after strenuous activity.
The EMSense EMS Massager is also lightweight and portable, meaning it fits well into modern lifestyles where flexibility is essential. Whether you want relief at home, at the office, or while traveling, it offers a convenient solution. It is small enough to carry in a bag and easy to set up within minutes, making it practical for consistent use.
In short, the EMSense EMS Massager is a tool built on proven stimulation principles, wrapped in a design that prioritizes comfort, portability, and ease of use. It supports both recovery and relaxation, making it suitable for anyone who wants better control over their muscle health in everyday life.
How the EMSense Massager Functions in Practice (EMSense Reviews)
The EMSense EMS Massager works by applying low-level electrical impulses to targeted muscle groups. These impulses are delivered through adhesive electrode pads that are placed on the skin. Once activated, the pulses mimic natural nerve signals, causing the muscle fibers beneath the skin to contract and relax. This cycle of stimulation helps the body in three main ways: easing tension, improving circulation, and supporting recovery.
When muscles contract, blood flow increases to that area. This circulation brings in oxygen and nutrients while helping to clear away metabolic waste that builds up during physical activity or prolonged sitting. Over time, this can reduce the feeling of heaviness in the legs, stiffness in the shoulders, or soreness after a workout. The EMSense EMS Massager makes this process more consistent by delivering even, repeatable pulses rather than relying on manual pressure that may vary from session to session.
Another aspect of its function is customization. The device offers different programs and intensity levels, allowing you to select the type of stimulation that matches your needs at that moment. A lighter pulse may be chosen for gentle relaxation after a long day, while a more powerful rhythm may be suitable for post-exercise recovery. Each program is designed with variations in frequency and duration to keep the muscle engaged in a safe yet effective way.
Comfort during use is also a core part of how the device works. Instead of sharp or erratic sensations, the pulses build gradually, giving you time to adjust to the intensity. This gradual increase ensures that the experience feels controlled, not overwhelming. A session timer is included so you do not need to keep track manually, and the device automatically stops when the cycle is complete, preventing unnecessary strain.
Practicality is another important feature of the EMSense EMS Massager. Because it is rechargeable, portable, and easy to set up, users can integrate short sessions into their day without disruption. Whether sitting at a desk, lying on the couch, or preparing for bed, the process requires only a few minutes. This accessibility makes it easier to maintain consistency, which is key to seeing long-term benefits.
In short, the EMSense EMS Massager functions by combining proven muscle stimulation technology with user-centered design. It encourages natural processes of relaxation and recovery, adapts to individual preferences, and delivers a reliable experience that fits into everyday life.
DON’T MISS OUT: EMSense EMS Massager Is Available At A Special Price – Click Here Now To Order Directly From The Official Website
Who Can Benefit Most from the EMSense EMS Massager
The EMSense EMS Massager is designed with versatility, meaning it can serve different groups of people with unique needs. Below are the categories of individuals who are most likely to benefit from using the device, along with the reasons why it suits them.
● Athletes and Fitness Enthusiasts: People who engage in sports or regular exercise often experience muscle soreness, stiffness, or delayed recovery. The EMSense EMS Massager provides a way to accelerate the natural recovery process by stimulating blood circulation and easing tension after workouts. It helps athletes return to training faster and with less discomfort, while also serving as a warm-up tool to prime muscles before activity.
● Office Workers and Students: Spending long hours at a desk can lead to stiff shoulders, tight neck muscles, and lower back discomfort. The EMSense EMS Massager offers a simple way to release built-up tension without the need for complex exercises or long breaks. Regular use can make extended sitting more manageable and reduce the likelihood of developing posture-related pain.
● Seniors Seeking Comfort and Mobility: Older adults often struggle with circulation issues and muscle stiffness that can make daily activities harder. The EMSense EMS Massager gently stimulates muscles, encouraging blood flow and reducing the sense of heaviness or fatigue. For seniors, this added comfort can support greater mobility and improve overall quality of life.
● Manual Laborers and Active Professionals: Construction workers, drivers, healthcare staff, and others in physically demanding jobs often carry muscle fatigue from repetitive tasks or long hours of movement. The EMSense EMS Massager helps them manage soreness and regain energy between shifts, ensuring they are better prepared for the demands of the next day.
● People Managing Stress and Tension: Stress frequently manifests as muscle tightness, especially in the neck, shoulders, and back. The EMSense EMS Massager provides a convenient form of relaxation that can be used at home in the evenings or during breaks. The soothing contractions help release physical stress, which may also improve sleep quality and mental clarity.
● Travelers and Commuters: Sitting for extended periods in cars, buses, trains, or airplanes can reduce circulation and cause muscles to feel heavy or sore. Because the EMSense EMS Massager is portable and rechargeable, it can be used during travel or soon after arriving at your destination to restore comfort and reduce stiffness.
● Rehabilitation and Recovery Support: While it should not replace medical treatment, people recovering from mild injuries or those looking to support physical therapy exercises can use the EMSense EMS Massager under guidance. It helps keep muscles active, reduces stiffness during recovery phases, and complements stretching or light exercise routines.
In summary, the EMSense EMS Massager benefits a wide range of users by providing targeted muscle stimulation that fits into different lifestyles. Its adaptability makes it suitable for athletes seeking performance, professionals needing relief, seniors looking for comfort, and anyone wanting a practical way to manage everyday tension.
Key Functional Advantages of Using the EMSense EMS Massager
The EMSense EMS Massager is more than just a recovery tool. It offers functional advantages that make it a practical part of everyday life. Each benefit is tied directly to how the device is designed and the role it plays in supporting muscle health and comfort.
● Promotes Effective Muscle Relaxation: One of the strongest advantages of the EMSense EMS Massager is its ability to relieve muscle tightness. By sending controlled impulses that cause small contractions, it helps loosen areas that often hold stress such as the shoulders, back, and calves. This relaxation is deeper and more consistent than what most people achieve through stretching alone.
● Improves Circulation for Better Recovery: Healthy blood flow is essential for muscle repair and overall comfort. The EMSense EMS Massager encourages circulation by activating muscles in a rhythmic pattern, which helps transport oxygen and nutrients while reducing the buildup of waste products. This makes it especially useful after workouts, long commutes, or periods of inactivity.
● Reduces Everyday Fatigue: Physical fatigue is not always caused by hard exercise. Long hours standing at work, carrying heavy loads, or simply sitting for extended periods can leave muscles feeling drained. The EMSense EMS Massager reduces this sense of heaviness by reactivating tired muscles and helping them regain energy.
● Supports Stress Relief and Mental Calm: Stress often settles into the body as tension. By easing stiffness in key muscle groups, the device indirectly supports mental calm. A short session before bed can release physical pressure, which may lead to improved rest and more peaceful sleep. This makes it a helpful addition to stress management routines.
● Offers Customizable Intensity Levels: Not every situation requires the same level of stimulation. The EMSense EMS Massager allows you to choose from different programs and adjust the intensity. This means a gentle session can be used for light relaxation, while a stronger program can target deep soreness after intense activity. The flexibility ensures that the device adapts to you rather than the other way around.
● Enhances Portability and Ease of Use: Unlike bulky recovery equipment, the EMSense EMS Massager is lightweight, compact, and rechargeable. You can carry it in a small bag, set it up in minutes, and use it wherever you are. This portability ensures that relief is never out of reach, whether at home, the office, or while traveling.
● Encourages Consistent Recovery Habits: Many people know they should care for their muscles, but complex routines make consistency difficult. The EMSense EMS Massager removes barriers by being easy to set up and requiring only a short session for benefits. This convenience makes it more likely you will use it regularly, which is the key to long-term results.
● Complements Warmups and Cooldowns: For people who exercise, the device works well before and after training. A short session before activity helps wake up the muscles, improving readiness and coordination. After activity, a longer session supports relaxation and reduces soreness. This dual function gives it a unique role in active lifestyles.
DON’T MISS OUT: EMSense EMS Massager Is Available At A Special Price – Click Here Now To Order Directly From The Official Website
Step-by-Step Guide on How to Use the EMSense EMS Massager
The EMSense EMS Massager is designed to be simple enough for beginners while still effective for experienced users. Following a clear step-by-step process ensures that each session is safe, comfortable, and beneficial.
Step 1: Prepare the Skin
Before placing the pads, make sure the skin is clean and dry. Wipe away any sweat, lotion, or oil because these can reduce contact and affect the quality of stimulation. Clean skin also helps the pads stick better and last longer.
Step 2: Attach the Electrode Pads
Connect the reusable electrode pads to the wires or clips provided. Place them directly over or near the muscle group you want to target. For example, position them on both sides of the lower back, across the shoulders, or on the front and back of the thigh. Ensure they sit flat on the skin with no air gaps.
Step 3: Connect to the Control Unit
Once the pads are in place, attach them to the EMSense EMS Massager’s control unit. The connection is usually straightforward and takes only a few seconds. Double-check that all wires are secure before turning the device on.
Step 4: Power On the Device
Press the power button to activate the device. Most models have a clear indicator light or display screen to confirm that it is on. At this stage, the device is ready but not yet delivering stimulation.
Step 5: Select a Program
Choose a program that matches your goal. Some options are designed for gentle relaxation, others for more intense recovery. Programs vary in rhythm, speed, and pulse frequency. Starting with a basic mode is recommended for new users.
Step 6: Adjust the Intensity
Use the controls to set the level of stimulation. Always begin at the lowest setting so your body has time to adapt. Gradually increase the intensity until you feel a comfortable contraction. The sensation should be firm but not painful.
Step 7: Begin the Session
Allow the program to run for the recommended duration, usually between 10 and 20 minutes. During this time, you can remain seated, reclined, or lying down. It is important to stay relaxed so the muscles can respond fully to the stimulation.
Step 8: Monitor and Adjust if Needed
If the intensity feels too strong or too light, use the control buttons to adjust. You may also move the pads slightly if they are not hitting the area you want to target.
Step 9: End the Session Safely
When the program finishes, the device will either turn off automatically or signal that the cycle is complete. Turn off the power, disconnect the pads, and gently remove them from your skin.
Step 10: Store the Device Properly
Wipe the pads if necessary and place the protective covers back on to preserve their adhesive quality. Store the control unit and pads in a dry place, ideally inside the case provided. Recharge the battery if the indicator shows low power so it is ready for the next session.
By following these steps, you ensure that each session with the EMSense EMS Massager is effective, safe, and consistent. The process takes only a few minutes to set up and maintain, making it easy to integrate into a daily or weekly routine.
Why the EMSense EMS Massager Stands Out Compared to Regular Massage Tools
Traditional massage tools such as foam rollers, handheld vibration devices, and manual massagers rely heavily on physical pressure applied either by the user or a therapist. While these can be effective in releasing surface-level tension, they often lack consistency and may not reach deeper layers of the muscle effectively. The EMSense EMS Massager distinguishes itself because it does not depend on manual effort or repeated pressure. Instead, it engages muscles from within by sending controlled electrical signals that activate muscle fibers directly. This internal stimulation provides a level of precision that is difficult to achieve with standard massage equipment.
Another point of difference lies in accessibility. Many massage tools require effort and strength to use effectively. A foam roller, for instance, demands body weight and correct positioning, which can be challenging for someone with limited mobility or chronic stiffness. The EMSense EMS Massager, however, requires little to no physical exertion. Once the pads are placed and the program is selected, the device does the work while the user remains at rest. This makes it suitable for individuals who may not have the flexibility or energy to use manual tools.
Consistency is also a defining factor. Regular massage tools often depend on the skill or persistence of the user. Pressure may vary from one session to another, and it is easy to cut a session short when using a manual device. The EMSense EMS Massager removes this inconsistency by delivering uniform pulses for the full duration of each program. This ensures that the muscle group receives the same level of stimulation every time, which can improve results over the long term.
Portability is another way the EMSense EMS Massager stands out. While handheld massagers and rollers can be carried around, they are not always practical for discreet use in the office or during travel. The EMSense EMS Massager is lightweight and compact, allowing users to enjoy a session quietly at home, at work, or even after a long flight. This convenience encourages more frequent use, which is often the key to achieving lasting relief.
Finally, the EMSense EMS Massager provides personalization that traditional massage tools rarely offer. The ability to select different stimulation patterns and adjust intensity levels means each session can be tailored to the user’s needs at that moment. A handheld tool may only provide vibration at a fixed speed, but the EMSense device can shift between gentle relaxation and deeper recovery modes with precision. This adaptability ensures that it meets a wide variety of demands without requiring multiple devices.
Health and Wellness Benefits of Incorporating the EMSense EMS Massager into Daily Life
Using the EMSense EMS Massager regularly extends beyond simple relief from soreness. It has broader implications for overall health and wellness, supporting both the body and the mind when integrated into a routine.
One of the key benefits is improved body awareness. When you use the EMSense EMS Massager on a regular basis, you become more in tune with which areas of your body tend to hold tension or fatigue. This awareness can encourage healthier habits, such as adjusting posture at work, stretching particular muscle groups, or balancing workouts more effectively. Over time, this mindful connection to your muscles may help prevent small discomforts from developing into more serious issues.
Another wellness benefit lies in promoting restorative rest. Many people find it difficult to transition from a busy day into deep, restful sleep because of lingering tension in the body. A session with the EMSense EMS Massager before bedtime can calm tight muscles and create a sense of physical ease that makes it easier to fall asleep and stay asleep. Quality rest is an essential part of recovery, and improved sleep cycles contribute to higher energy levels and better focus during the day.
The device also encourages consistency in self-care. Unlike treatments that require scheduling appointments or traveling to a therapy center, the EMSense EMS Massager is always within reach. This accessibility makes it easier to stick to a routine, ensuring that recovery and relaxation are not occasional but ongoing parts of daily life. Consistency, in turn, leads to more lasting benefits for flexibility, resilience, and comfort.
Emotional well-being is another area where the EMSense EMS Massager can have a positive effect. Stress often manifests physically, creating a feedback loop where tight muscles increase feelings of tension, which then heightens stress further. By interrupting this cycle through regular relaxation sessions, the device indirectly supports emotional balance. Many users find that even short sessions help them feel calmer, more centered, and ready to face daily challenges.
Lastly, incorporating the EMSense EMS Massager into a wellness plan can complement other healthy practices. Whether combined with yoga, stretching, meditation, or fitness training, it enhances the benefits of these activities by ensuring the body is relaxed and ready to perform. This synergy between the device and other wellness habits creates a more holistic approach to health, addressing both physical and mental well-being in a balanced way.
DON’T MISS OUT: EMSense EMS Massager Is Available At A Special Price – Click Here Now To Order Directly From The Official Website
Practical Scenarios Where the EMSense EMS Massager Can Be Used
The versatility of the EMSense EMS Massager makes it suitable for many day-to-day situations. Because it is compact, easy to use, and adaptable, it can fit into different parts of life without disruption. Below are some of the most practical scenarios where it can be used effectively.
● After a Workout or Physical Training: Muscles often feel stiff and sore after exercise. Using the EMSense EMS Massager in this period can help stimulate recovery by encouraging circulation and reducing the buildup of fatigue in the worked muscles. A short session on the thighs, calves, or arms can make the following day more comfortable and allow you to return to training sooner.
● During Breaks at the Office: Long hours at a desk can lead to tight shoulders and a heavy lower back. The EMSense EMS Massager provides a quick solution during a coffee break or lunch period. Because it is compact and quiet, you can use it discreetly at your workstation to release tension without needing to leave the office.
● In the Evenings at Home: Many people carry stress from their day into the evening, which makes it harder to unwind. A session with the EMSense EMS Massager before dinner or while watching television can help the body relax, creating a smoother transition from work mode to rest mode. This makes evenings more enjoyable and prepares the body for restful sleep.
● Before Bedtime: Sleep quality can be greatly affected by muscle tightness and lingering discomfort. Using the device shortly before bed allows the body to release these tensions. Relaxed muscles often lead to easier sleep and deeper rest, which contributes to better overall health.
● While Traveling: Whether on long flights, car rides, or train journeys, sitting for extended periods reduces circulation and creates stiffness. The EMSense EMS Massager is portable enough to be used after arriving at your destination to restore comfort quickly. Travelers can keep it in a bag and use it in hotels to recover from hours of immobility.
● On Rest Days for Recovery: Athletes and fitness enthusiasts know that recovery is as important as training itself. On days when you are not exercising, the EMSense EMS Massager can be used to maintain circulation and keep muscles active without strain. This light stimulation helps prevent stiffness and ensures you are ready for the next workout.
● For Stressful Periods: Exams, project deadlines, or busy schedules often increase stress levels. Physical symptoms such as headaches or tension in the neck are common during these times. Using the EMSense EMS Massager offers not only muscle relaxation but also mental relief, helping to reduce the impact of stress on the body.
Design and Build Quality of the EMSense EMS Massager
The EMSense EMS Massager is crafted with attention to both functionality and user comfort. Its design reflects a balance between advanced technology and everyday practicality, making it a device that is easy to handle and pleasant to use regularly.
The main control unit is compact, lightweight, and shaped for portability. This ensures that it can be held comfortably in one hand and stored without taking up much space. The streamlined body design avoids unnecessary bulk, which makes it ideal for users who want a recovery tool that fits easily into a gym bag, office drawer, or travel case.
A clear interface sits at the center of its design. The control panel is intuitive, featuring straightforward buttons or touch controls that allow quick selection of programs and intensity levels. Some models include a simple display screen that shows session time and current settings, so there is no confusion during use. This thoughtful layout reduces learning curves and ensures that even first-time users can operate it confidently.
The electrode pads are another key part of its build. They are made with skin-friendly materials that adhere securely without causing irritation. Designed to be reusable, they maintain their adhesive quality over multiple sessions when properly stored. The pads are flexible, allowing them to contour naturally to different areas of the body, whether placed on curved surfaces like shoulders or flatter muscles such as the thighs.
Durability is also built into the EMSense EMS Massager. The casing is made from sturdy materials that withstand regular handling, while the connectors and wires are reinforced to reduce wear and tear. The rechargeable battery supports multiple sessions on a single charge, and the device is built to maintain consistent performance over time.
Attention to comfort is visible in every detail. The stimulation patterns are delivered in smooth waves rather than harsh spikes, which ensures the user experiences effective contractions without sharp or unpleasant sensations. This makes it easier to extend sessions and integrate them into daily routines.
Overall, the design and build quality of the EMSense EMS Massager combine sleek form with durable function. It is modern in appearance, reliable in performance, and comfortable for extended use, ensuring it meets the demands of a wide range of users.
Scientific Principles Behind EMS Technology in the EMSense EMS Massager
The EMSense EMS Massager operates on the foundation of electrical muscle stimulation, a method widely recognized in physical therapy, sports medicine, and rehabilitation science. Understanding the principles behind this technology highlights why the device is effective for everyday relief and recovery.
Electrical muscle stimulation works by sending controlled pulses of electricity through the skin into the underlying muscle fibers. These impulses mimic the natural signals that the nervous system uses to tell muscles to contract. When the pads are placed correctly, the current travels along motor nerves, causing the muscle to contract and then release in rhythmic cycles. This process engages the muscle without requiring voluntary movement, making it especially valuable for recovery, relaxation, and circulation.
One of the key scientific benefits of EMS is improved blood flow. When a muscle contracts, it compresses the blood vessels in that area, and when it relaxes, fresh oxygen-rich blood flows back in. Repeating this cycle through electrical stimulation enhances circulation, helping to deliver nutrients needed for recovery and to remove metabolic byproducts like lactic acid. This mechanism is why EMS is commonly used by athletes to reduce soreness and support faster recovery.
Another principle at play is neuromuscular activation. Over time, certain muscles can become underused due to lifestyle habits, poor posture, or injury. EMS provides external stimulation that reactivates these muscles, reminding the body how to engage them effectively. This is particularly useful for individuals who sit for long periods or those in early stages of rehabilitation after an injury, as it encourages the muscle fibers to remain active even when voluntary exercise is limited.
EMS also influences pain management through the gate control theory of pain. According to this principle, when non-painful stimuli such as electrical pulses are sent to the nervous system, they can interfere with or “gate” the transmission of pain signals to the brain. In practice, this means that using the EMSense EMS Massager may help reduce the perception of discomfort in certain areas, creating a soothing effect.
The frequency and pattern of the impulses are carefully engineered. Low-frequency pulses tend to provide gentle, soothing contractions suited for relaxation, while higher frequencies can deliver stronger contractions that mimic the effects of active muscle work. By offering multiple programs, the EMSense EMS Massager leverages these variations to achieve different outcomes, whether for recovery, comfort, or activation.
In essence, the scientific foundation of the EMSense EMS Massager is a combination of electrical nerve stimulation, improved circulation, neuromuscular reactivation, and pain modulation. These principles explain why it is effective not just as a relaxation tool but also as a valuable aid in maintaining muscle health in daily life.
Price and Where to Buy the EMSense EMS Massager
The EMSense EMS Massager is available at discounted rates directly through the official website. Purchasing from the official source ensures you receive the authentic device, complete with warranty coverage, safe payment options, and access to ongoing customer support. Below is the current pricing structure:
- 1x EMSense Triple-Technology Massager– Originally priced at $99.99, now available for $49.99 (50% off) with free shipping
- 2x EMSense Triple-Technology Massagers– Originally $179.99, now offered at $39.45 each (55% off) with free shipping This is listed as the most popular package for buyers who want one unit for themselves and another for a family member.
- 4x EMSense Triple-Technology Massagers– Originally $370.99, now reduced by 60% for the best value deal with free shipping This option is ideal for households that want multiple devices or for sharing among friends.
All purchases should be made directly from the official EMSense website, as this is the only secure platform that guarantees authentic products. Buying from the official source also allows access to limited-time discounts and ensures that replacements, accessories, or future updates can be obtained without risk of counterfeit products.
Safety Considerations When Using the EMSense EMS Massager
The EMSense EMS Massager is designed to be safe and comfortable for everyday use, but like any technology that interacts with the body, certain precautions are important. Understanding these considerations helps ensure each session is both effective and risk-free.
The first safety principle is starting with low intensity. Because the device delivers electrical impulses directly to muscles, it is best to begin at the lowest setting and gradually increase until you find a comfortable level. This allows the body to adapt without unexpected shocks or strain. Sudden high stimulation can be overwhelming, especially for new users, so gradual adjustment is key.
Placement of the pads is also an important factor. Pads should only be applied to muscle groups such as the arms, legs, back, and shoulders. They should never be placed on the head, throat, chest near the heart, or over broken or irritated skin. Correct placement ensures that stimulation is targeted where it is beneficial and avoids areas where it could interfere with normal body functions.
Users with implanted medical devices such as pacemakers or defibrillators should avoid EMS technology altogether unless explicitly cleared by a healthcare professional. The electrical impulses could interfere with the function of such devices. Similarly, individuals with certain medical conditions, including epilepsy or severe heart problems, should consult a doctor before use.
Session length is another consideration. Most programs are designed to run between 10 and 20 minutes. Extending sessions beyond recommended times does not necessarily provide more benefit and may increase the risk of irritation to the skin or muscles. The built-in timer helps manage this, but it is wise to follow the manufacturer’s guidance consistently.
Skin care is also part of safe use. Pads should only be applied to clean, dry skin. Applying them over lotion or sweat may reduce adhesion and create uneven stimulation. After a session, removing the pads gently prevents unnecessary irritation. For people with sensitive skin, monitoring for any redness or discomfort after use is advised.
Children and pregnant women should avoid using EMS devices unless specifically instructed by a healthcare professional. While the technology is generally safe, these groups require special care to avoid unintended effects.
Finally, regular inspection of the device ensures safety. Checking that pads are in good condition, wires are not frayed, and the battery is working properly helps avoid malfunctions. Storing the EMSense EMS Massager in a dry environment further extends its reliability and safety.
By following these considerations, gradual intensity, correct placement, appropriate duration, and mindful health checks, users can enjoy the benefits of the EMSense EMS Massager with confidence. It is a safe tool when respected and used responsibly as part of a wellness routine.
Frequently Asked Questions About the EMSense EMS Massager
What does the EMSense EMS Massager actually do for muscles?
The EMSense EMS Massager works by sending controlled electrical impulses into the muscle fibers, causing them to contract and release in a rhythmic way. This process improves blood circulation, reduces tension, and helps speed up recovery after physical activity or long periods of inactivity. The consistent stimulation also keeps muscles active and responsive, even when you are at rest.
Is the EMSense EMS Massager safe for daily use?
Yes, the EMSense EMS Massager is designed for regular use, provided it is operated according to the manufacturer’s guidelines. Each session typically lasts between 10 and 20 minutes, which is considered safe for most healthy adults. However, people with implanted medical devices, severe health conditions, or pregnant women should consult a healthcare professional before using EMS technology.
Can the EMSense EMS Massager replace a professional massage or therapy session?
The device is not a complete replacement for professional therapy. It is best viewed as a complementary tool. Professional sessions involve hands-on techniques and assessments that a device cannot replicate. However, the EMSense EMS Massager provides consistent stimulation at home, helping to bridge the gap between therapy appointments and offering everyday relief.
How quickly can results be felt from using the EMSense EMS Massager?
Many users notice a difference after the very first session, especially in reduced muscle tension or a sense of relaxation. For long-term benefits such as improved recovery, better flexibility, or reduced soreness, consistent use over several weeks is recommended. Like any wellness tool, results improve with routine.
Where should I avoid placing the EMSense EMS Massager pads?
The pads should not be applied to the chest near the heart, the throat, the head, or over broken or irritated skin. Safe areas include large muscle groups like the thighs, calves, back, shoulders, and arms. Correct placement ensures safe and effective stimulation without unnecessary risks.
How long do the electrode pads last?
The lifespan of the electrode pads depends on how often they are used and how well they are maintained. With proper care, such as placing the protective covers back on after each session and applying them to clean, dry skin, they can last for multiple uses before needing replacement.
Can beginners use the EMSense EMS Massager easily?
Yes, the EMSense EMS Massager is beginner-friendly. The setup process is simple, and the device offers gradual intensity adjustments that allow first-time users to start gently. Clear instructions and program options help make the learning curve short and stress-free.
Is the EMSense EMS Massager useful for stress relief, or only for fitness recovery?
It is useful for both. While athletes often use it for post-workout recovery, many everyday users rely on it for relaxation. The rhythmic contractions help release muscle tension caused by stress, which may also support improved sleep and mental calm.
Can the EMSense EMS Massager be used while working or traveling?
Yes, portability is one of its strongest features. The device is compact and rechargeable, making it easy to use at home, at the office, or during travel. Many people incorporate short sessions during breaks or after long journeys to restore comfort quickly.
Does the EMSense Massager help with circulation problems?
The device promotes blood flow by engaging muscles in contraction and relaxation cycles. This stimulation can improve circulation and reduce the feeling of heaviness in muscles, especially in the legs. While it supports circulation, it is not a medical treatment for severe circulatory conditions, so professional advice should be sought if you have underlying health issues.
DON’T MISS OUT: EMSense EMS Massager Is Available At A Special Price – Click Here Now To Order Directly From The Official Website
Final Verdict on the EMSense EMS Massager
The EMSense EMS Massager has already gained strong recognition among users across the United States, the United Kingdom, and Canada. Verified buyers in these regions consistently rate the device highly for its ability to relieve muscle discomfort, reduce stiffness, and promote faster recovery. On average, it holds a 4.7 out of 5 star rating, which reflects not only its effectiveness but also the trust it has built among everyday users.
Customer reviews highlight how practical it is for different lifestyles. Office workers in the US praise it for easing neck and shoulder tension after long desk hours. Fitness enthusiasts in the UK often mention how it supports recovery after workouts and prevents soreness from slowing them down. Seniors in Canada commend it for improving comfort in the legs and back, especially after extended periods of sitting or standing. These experiences showcase its versatility and wide appeal across age groups and activity levels.
What sets the EMSense EMS Massager apart in user feedback is the balance between performance and convenience. Many buyers appreciate that it is lightweight, easy to operate, and portable enough to use at home, at the office, or even while traveling. The multiple programs and intensity options also receive frequent praise because they allow for personalized sessions, whether for gentle relaxation or deeper recovery.
In terms of purchasing, customers in all three regions emphasize the importance of buying directly from the official EMSense website. Doing so ensures they receive the authentic device, free shipping offers, warranty protection, and secure payment options. Reviews from verified buyers make it clear that those who ordered through the official site enjoyed not only the product itself but also reliable customer service and peace of mind.
In conclusion, the EMSense EMS Massager is already highly rated by real users in the US, UK, and Canada for its comfort, efficiency, and everyday practicality. It has become a trusted choice for people seeking consistent muscle relief and recovery without the hassle of complex routines or expensive appointments. For anyone considering it, the safest and most cost-effective option remains ordering directly from the official website to access the best deals and ensure product authenticity.

Source: EMSense Reviews: Is EMSense EMS Massager Worth the hype?